
#TutorialTuesday: Sora Cosplay Write-up

Happy Kingdom Hearts 3 launch, everybody!
We’ve waited SO long for this main story to continue – the last time I was really into Kingdom Hearts was when I cosplayed Sora from Kingdom Hearts 2…10 YEARS AGO!!

To celebrate this new installment, I’m going to make an epic 10-year throwback to my KH2 Sora cosplay and attempt to make a Sora tutorial for you.
(I say attempt because 10 years ago I didn’t really take work-in-progress pictures…so it’s going to be closer to a write-up than a step by step tutorial).

Costume:
Breakdown: Standard pleather hoodie jacket cut short + standard inner shirt with a tummy pocket + a fat balloon pant with random shit stuck all over it. The giant zipper was made from EVA skin sheets, for the EXTRA GINORMOUS teeth. The shoulder pads were silver vinyl fabric trimmed with white bias tape.
The balloon pants were lined with heavy fabric to give it some mass. I left gaps in the lining to allow airflow, so the pants actually inflate like a balloon when I bend my legs which was pretty fucking cute.


Necklace and Buckles: all modeled from Sculpy oven bake clay.
Gloves: Nothing special here.I bought a pair of gloves and stuck belts and pads onto them.
Shoes: These were my pride and joy back then. I got a pair of CROCS, taped a massive amount of Hobby Fill to the front then covered the shoe with spandex for the big round look. Then I just stuck all the random zippers and belts onto them.
Wig: Before the time of quality wigs… I styled my Sora wig using a punky party wig. I just spent a night with a can of hairspray and a tube of got2be hair gel and a blow dryer. Completed in 5 hours. Destroyed by the wind at the beaches of Perth where we did our first photoshoot in 2 seconds.

Oathkeeper Keyblade:
First I drafted a stencil by hand onto several sheets of baking paper.
Then I transferred the stencil to sheet of 12mm ply wood and cut that shit out with a jigsaw. Then I ran a table router along all the edges to give it some beveled edges. Further details and contours were then built on with DAS modelling clay, and sanded smooth once dry. Nowadays, a more lightweight and quicker drying option is foam clay from luminsworkshop.com.
The paupu fruit is a hand sewn plushy. The leaf that’s attached to it was a real leaf that I picked from my garden.
The paint job was done with several enamel spray paints. I chose a metallic sky blue for the center of the colourful detail to give it a much more elegant shine instead of the rather kindergarten colours that a dark blue gives off when applied next to yellow. The wings were done with a gradient of dusk gray and beige to enhance the smoothness of the feathers. I didn’t own an airbrush, so all the gradient effects were done by extremely careful spraying with the spray can that the paints came in.
 Oblivion Keyblade:
First I drafted a stencil by hand onto several sheets of baking paper.
Then I transferred the stencil to sheet of 12mm ply wood and cut that shit out with a jigsaw. Then I ran a table router along all the edges to give it some beveled edges.
All details were molded on top with DAS air dry clay. Once again, foam clay from luminsworkshop.com would work now too.
I made the chain that runs down the middle of the keyblade out of oven bake clay.
For the painting, I mixed Metallic Grey and Black to give it realistic colour and weapon-like shine. The center gem was colored with silver with a layer of clear blue on top.
THAT’S IT! That’s how I made Sora 10 years ago.
I hope you enjoyed my Baby Wirru crafting and I hope it gives you some crafty ideas for your own cosplays. Happy KH3 launch~
Please support my ongoing supply of cosplay tutorials by either becoming a Patron on Patreon or purchasing a book from my Store.

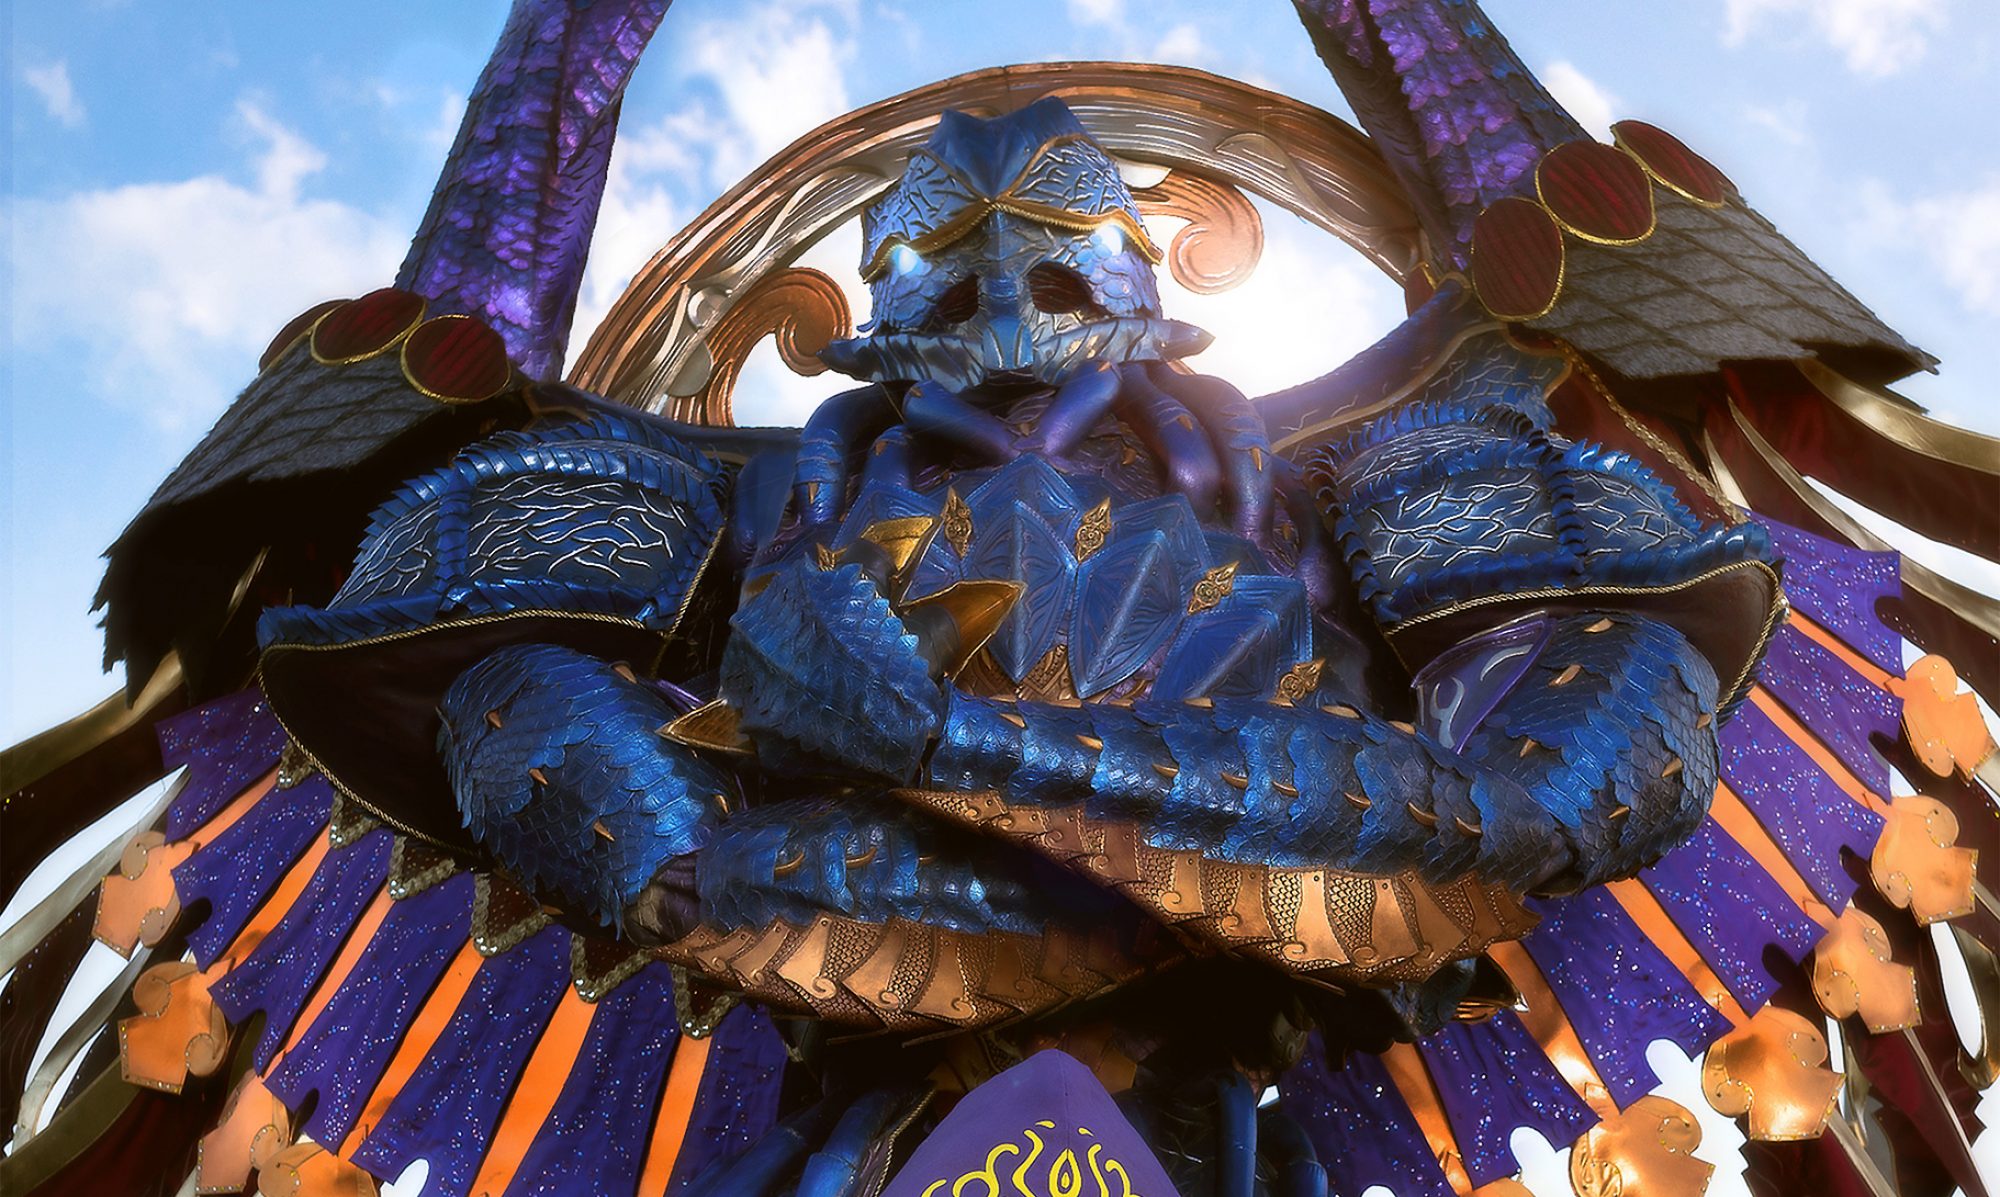
Bahamut’s 1st Birthday!

Bahamut turns 1 today.
We celebrated very appropriately: hanging out with Lady HIGH Summoner.

Last year today, after 7 months of labor, Bahamut was born early at Oz Comic Con SYDNEY 2017.

When I was chosen as national champion to represent Australia in the global championship in Chicago, I shoved him back into the womb (my living room) and kept birthing him for another 7 months. Making him a 14 month baby in total.
This project started off as my personal challenge in 2017 and became so much more.


He’s heavy. He took a long time. He’s troublesome to bring to any event. He’s larger than our house. The cats like to sleep in him so I can’t even wear him anymore without getting my lungs fucked up from allergies.

But he’s been made with all of my love for Final Fantasy X, and all of my pride as a craftsmanship-focused cosplayer.
Loop

Thanks to this project, I’ve made so many great memories (and war flashbacks) with my close friends and the Australian (and hopefully global) community.

This project also ultimately help me realise what kind of cosplayer and craftsman I truly want to be.
Happy birthday my oversized dragon child.
I equally love and hate you.
You’ll always be my only oversized child because fuck making things larger than my house ever again. ❤

Learn the techniques I used to make Bahamut possible with my Project Books. Available in my store the WIRRU-MART 🤩

Available in Ebook, Physical Book, or bundle of both.
WELCOME TO THE NEW WORLD
Here is the first, and perhaps one of my favorite solo shots, of my Field Team Leader cosplay from Monster Hunter World.

Costume made and worn by me.
Photo by LARK VISUALS.
This shoot was so much fun. The location was a rocky cliff by the sea and transported me straight into the world of Monster Hunter.
The full photo album of this cosplay is out now for members on Patreon.
This shot will be included in my upcoming Project Book: HUNTSMAN.
5 days left to PREORDER at the Wirru–Mart!
Even in the toughest of trials, there is always time for a smile.

🌸Yuna by Taffles
📸Photo by Byte Size Photography
I love this shot of us taken during our first outdoor shoot of Bahamut after coming home from C2e2 Global Championships. It was the first time I put him on since coming home, we hadn’t seen him unpacked from his bags until this moment and we were all just excited that he survived going to AND from Chicago without a scratch.
I sure made him tough, huh!
Monster Hunter World, Field Team Leader leatherwork
G’day Wirrudos!

Here’s a closer look at the leatherwork parts on my Field Team Leader costume. This was such a fun project for me to go entirely organic and leather. The flavor of the Monster Hunter World world suited my crafting style really well.
I’ll eventually put my entire project log on here.
But for now, let the abridged layers of hell begin:


